Wednesday, March 31, 2010

Installing the TC Integration Module 1.1

In my last post I provided an overview of the Telligent Community integration module for Sitecore. While the module comes with a lot of documentation - including instructions on how to install the module - sometimes it's helpful to have someone guide you through the process. That's what I'm going to do.

TC integration module architecture
Before I get into the actual installation instructions, it's important to understand what you're going to install. I will explain each section when I get to it, but here's a quick overview:
  • Authentication is handled by Sitecore using ASP.NET forms authentication.
  • Sitecore is responsible for creating an authentication cookie that TC uses to provide single sign-on.
  • Sitecore passes user information to TC so TC knows which roles the user has been assigned to.
  • TC content is exposed to Sitecore through a REST API.
  • Additions to the Sitecore client are installed using a Sitecore package.
Pre-requisites
Before you attempt to install the TC integration module version 1.1, be aware of the following:
  • You must be running Sitecore 6.1 or 6.2.
  • You must be running Telligent Community 5.0 SP1. Version 5.5 might work, but I haven't tested it to know for sure.
  • Sitecore and Telligent Community must be running in the website or TC must be running in a domain of the Sitecore server. For example, if TC is using the domain "tc.test-server.com", then Sitecore must be using the domain "test-server.com".
  • You must have read/write permissions on the folders in which Sitecore and TC are installed.
  • You must have the ability to upload files to the folder in which Sitecore and TC are installed.
  • You must have an administrator account on Sitecore and TC
If you have all of these things ready, you are safe to proceed. Don't be overwhelmed by the number of steps. It's not as bad as it may look :-)

Step 1 - Download the integration module.
The integration module can be downloaded from the Sitecore's SVN server. The easiest way to get the module is to use an SVN client for Visual Studio like AnkhSVN. You want to download the trunk code since this contains the latest bug fixes.


Step 2 (optional) - Compile the .NET assemblies.
You don't have to recompile the .NET assemblies, but I think it's a good idea because it will ensure that you are using the latest available code. Here's a description of each of the C# projects that make up the integration module so you understand what you are compiling:
  • Sitecore.CommunityServerSecurityIntegration.CommunityServerSide - This assembly is deployed to the TC server. It contains code to support single sign-on as well as extensions to TC's REST API.
  • Sitecore.CommunityServerSecurityIntegration.SitecoreSide - This assembly is deployed to the Sitecore server. It contains code that allows Sitecore to create the cookies that are used by TC and to migrate existing TC users into Sitecore.
  • Sitecore.CommunityServersIntegration.Controls - This assembly is deployed to the Sitecore server. It is where the components that are used to access TC content are defined.
  • CSComponentWizard - This assembly is deployed to the Sitecore server. It is where Sitecore client user interface additions are implemented.

Step 3 - Deploy assemblies to TC.
Copy the assembly "Sitecore.CommunityServerSecurityIntegration.CommunityServerSide.dll" to the TC server. The assembly should go in the bin folder.


Step 4 - Add a security extension in TC.
New functionality can be added to TC using extensions. A security extension allows TC to use cookies that are created by Sitecore for single sign-on.

In order to use an extension, TC must be configured to allow extensions to run. In the "communityserver.config" file in TC, set the following attribute:
  • node path:/CommunityServer/Core/extensionModules
  • attribute name: enabled
  • attribute value: true
Next you need to specify that TC should use a custom class to handle forms authentication. In the extensionModules node you just modified, find the FormsAuthentication security extension. Hint: look for <add name="FormsAuthentication"... Replace the node with the following:

<name="formsauthentication" name="FormsAuthentication" extensiontype="Security" type="Sitecore.CommunityServerSecurityIntegration.CommunityServerSide.SitecoreFormsAuthentication, Sitecore.CommunityServerSecurityIntegration.CommunityServerSide" allowautouserregistration="true" userprofilecookie="CSUserProfile" useencryptedcookie="false" profilerefreshinterval="1" />

Here's a breakdown of what the attributes mean:
  • name - The name of the extension you are configuring.
  • extensionType - TC supports a variety of extensions. This specifies that this extension deals with security.
  • type - The name of the class (and assembly) that implements the extension.
  • allowAutoUserRegistration - When a user logs in from Sitecore, an authentication cookie is created. TC uses that cookie to authenticate the user. If the user doesn't already exist in TC, this setting instructs TC to create the user.
  • userProfileCookie - The name of the cookie that contains user profile information about the user who has been authenticated by Sitecore. TC uses the cookie's value to set values on the TC user. Later you will configure the setting in Sitecore that sets this value.
  • useEncryptedCookie -Specifies if the value saved in the userProfileCookie is encrypted. Later you will configure the setting in Sitecore that sets this value.
  • profileRefreshInterval - This value specifies the frequency with which TC will refresh user information. The unit is in days, with 1 being the minimal value.

Step 5 - Enable REST API in TC.
TC provides access to its content through a REST API. This API must be enabled before Sitecore can use it.
  1. Log into TC using an administrator account.
  2. Navigate to the TC control panel and click the "Site Administration" link.
  3. Click the "Manage REST API" tab.
  4. Make sure the "Yes" option is selected and click the "Save" button.

Step 6 - Generate an application key in TC.
Sitecore uses a TC admin account in order to retrieve content. For this to work, Sitecore needs the TC admin user name and an application key.
  1. Log into TC using the admin account you intend to have Sitecore use.
  2. Edit the user's settings.
  3. Navigate to the "Site Options" tab.
  4. Scroll to the bottom of the screen and click the "Create and Edit Application Keys" link.
  5. In the "name" field enter "Sitecore" and click the "Generate" button.
  6. Write down the API key that is generated. You will need this value when you configure the connection from Sitecore to TC.

Step 7 - Modify web handlers in TC.
This integration module allows Sitecore users to filter and repurpose TC content. In order to provide Sitecore users with a variety of ways to do this, TC's REST API had to be extended.

This step involves changing the web handlers that process the REST calls. These web handlers can be found in the api\ folder under TC. The following files need to be modified. The class name in each file needs to be changed to the value following the file name:
  1. groups.ashx: CommunityServer.WebServices.Services.CSIGroupsService
  2. mediagallery.ashx: CommunityServer.WebServices.Services.CSIMediaGalleriesService
  3. membership.ashx: CommunityServer.WebServices.Services.CSIMembershipService
  4. search.ashx: CommunityServer.WebServices.Services.CSISearchService

Step 8 - Install the integration module deployment package in Sitecore.
The deployment package is available in the file named "TCSC Integration - Sitecore side-1.1.x.zip". Install this package using the Sitecore Installation Wizard.

The package includes a number of Sitecore items and files that are copied to the filesystem. Some of those files are .NET assemblies. If you recompiled the assemblies earlier, you will want to copy those assemblies into the bin\ folder in Sitecore.


Step 9 - Add a connection string in Sitecore.
Since TC is an external system that Sitecore is connecting to, an entry for TC must be added to Sitecore's connectionstring.config file. Add the following to the configuration file:

<add name="tc" connectionstring="siteUrl=http://your-server.com/tc;username=admin;apiKey=c00y45fd" />

Of course, the specific values you enter here will be different than the ones above. Here's an explanation of the values in the connectionString attribute:
  • siteUrl - The base URL to your TC server. If you enter the URL in a browser you should be taken to the TC homepage.
  • username - The name of the TC administrator account that Sitecore uses to communicate with TC. This must be the same account you used earlier to generate the API key.
  • apiKey - The API key value you generated earlier.

Step 10 - Modify the integration module configuration file in Sitecore.
One of the files that is created by the deployment package is the integration module configuration file. This file is located in the folder "app_config/include/". The name of the file is "CommunityServerIntegration.config".

Locate the node "/configuration/sitecore/settings". This node defines the basic settings used by the integration module. Here's a description of the settings:
  • CS.ProfileCookie - Remember the "userProfileCookie" attribute in TC's "communityserver.config" file? This value must match that.
  • CS.EncryptProfile - This value must match the "useEncryptedCookie" attribute value from TC's "communityserver.config" file.
  • CS.ConnectionStringName - This value must match the name of the connection string you configured in Sitecore's "connectionstring.config" file.
Using the values I've already configured, this is what my settings node looks like:

<settings>
<setting name="CS.ProfileCookie" value="CSUserProfile" />
<setting name="CS.EncryptProfile" value="false" />
<setting name="CS.ConnectionStringName" value="tc" />
</settings>


Step 11 - Configure forms authentication settings in Sitecore.
In order for single sign-on to work, both Sitecore and TC must use forms authentication. Additionally, the forms authentication settings for both must match. Make sure the "authentication" node in Sitecore's "web.config" file matches the node in TC's "web.config" file.

The important part here is the the authentication form's name and domain match. Here's the authentication node from my installation:

<authentication mode="Forms">
<forms name=".CommunityServer" protection="All" timeout="60000" loginurl="login.aspx" slidingexpiration="true" domain=".nicam.com" />
</authentication>

The domain attribute is required if TC is running in a subdomain. The dot before the domain name is needed in order for the browser to use the same cookie when sending requests to either the domain or the subdomain.

Also - and this may be common knowledge among developers but it can't hurt to be repeated - be sure your domain has at least one dot in it already. The cookie will not be written if your domain is simply "nicam". It needs to be "nicam.com".


Step 12 - Ensure the machineKey values in Sitecore and TC match.
The "machineKey" settings is important when using forms authentication in ASP.NET. Both Sitecore and TC must have the same "machineKey" configuration.

This configuration can be found in web.config. If no "machineKey" configuration exists, it must be added. Online tools are available - like this one - to generate the required settings. After you generate the configuration, add it to web.config as the last tag before the closing "system.web" tag (</system.web>).


Step 13 (optional) - Configure role and property mappings from Sitecore to TC.
Sitecore's "CommunityServerIntegration.config" file contains 2 sections that allow Sitecore user settings to be mapped to TC user settings.

The first mapping section is "rolesCorrespondence". This section allows you to specify user roles in Sitecore but still take advantage of security in TC. Sitecore roles are mapped to TC roles.

When the authentication cookie is created, the Sitecore user's roles are checked against this setting. The names of the appropriate TC roles are set in the authentication cookie. When single sign-on happens in TC, the custom forms authentication class that TC uses reads the roles from the authentication cookie and adds those roles to the TC user.

The following is an example of role mapping:

<rolesCorrespondence>
<role communityserverrole="Employees" sitecorerole="sitecore\Author" />
<role communityserverrole="Visitors" sitecorerole="extranet\Nicam" />
</rolesCorrespondence>


The second mapping section is "mappedProfileProperties". This is where Sitecore user profile properties are mapped to TC user profile properties. These values are passed to TC through the user profile cookie.

<mappedProfileProperties>
<property communityserverproperty="PublicEmail" sitecoreproperty="Email">
<property communityserverproperty="CommonName" sitecoreproperty="FullName">
</mappedProfileProperties>


Step 14 - Enable the HTML editor for display templates
Display templates determine how content retrieved from TC by the community component is formatted. Sitecore users are able control this presentation by using a rich text editor to edit display templates.

A couple of changes to the Sitecore file "/sitecore/shell/Controls/Rich Text Editor/Default.aspx" are required:
  1. Change the "Inherits" attribute to "Sitecore.CommunityServerIntegration.Editors.CSRADEditor". This class extends the standard Sitecore rich text editor to support the dropdown list that allows an editor to select the specific TC content fields to display.
  2. At the bottom of the file, add a link to the Javascript file "/sitecore modules/Shell/CSSCIntegration/RichText Commands.js". It is important that this be the last Javascript file that the browser loads. Otherwise the code in the file may be overriden by another script.

Next steps
The integration module is installed, but there's more work to do. Since Sitecore is handling authentication and is responsible for role management, existing TC users must be migrated into Sitecore. Also, Sitecore needs to be configured to create the cookies (authentication and user profile) that TC needs in order to sign a user in. I will cover these topics in my next post.

Want to learn more?

Monday, March 29, 2010

Introduction to Telligent Community Integration Module for Sitecore

The Sitecore Shared Source Library has a lot of interesting and useful projects that are available for free. In this post I want to introduce the Telligent Community integration module. I will explain what the module does and show that it looks like in action.

Sitecore website that incorporates Telligent Community content.

For those of you who don't know, Telligent Community is a .NET-based system for building and maintaining communities. Inside Telligent Community, applications provide blog, wiki, forum and media gallery functionality.

So what does this integration do? Two things. The first is integrated security. Single sign-on between Sitecore and TC is supported. Sitecore can be used to manage TC users and roles.

The second is the ability to repurpose TC content in Sitecore. The integration provides a variety of ways to incorporate TC content into a Sitecore website, including a wizard that allows Page Editor users to select the TC content they want to use. It also provides a variety of ways to control how that content is presented, including a rich-text editor for building display templates.

I will save the technical details on how all this works for later posts. For now I want to focus on what the integration does rather than how it does it. The easiest way to do this is through some videos. And if you're only going to watch one video, I suggest video #2.

Video 1: Security integration features
This video covers the module's security integration features. It demonstrates how single sign-on works and how Sitecore is used for role management.


Security integration using the TC integration module 1.1.

Video 2: Content repurposing
The integration module provides a number of ways to repurpose content. This video explains these options. It also covers the "community component", which is a Sitecore control that allows Sitecore content authors to repurpose Telligent Community content through a wizard interface.


Content repurposing using the TC integration module 1.1.


Video 3: Controlling presentation logic
This video demonstrates how the integration module allows custom presentation logic to be defined in Sitecore and applied to Telligent Community content.


Controlling presentation logic using the TC integration module 1.1.


Want to learn more?

Thursday, March 25, 2010

Custom Fields, Part 3

In my last post I explained how to create a custom user interface for editing a name in Page Editor. I left off suggesting that there's a problem with the current implementation. And there is: it is possible to circumvent the user interface by using the inline editing feature provided by the default field renderer.

Inline editing circumvents my new user interface.

Why is that happening? Well, as far inline editing is concerned, Sitecore doesn't have any special instructions on how to handle a name field. Therefore, Sitecore treats the field like a single-line text field.

Since I created this special user interface to handle the name field, I want Sitecore to use that interface. And while in some cases being able to use inline editing to modify a field value may be advantageous, in this case I want it disabled.

In this post I'm going to cover 3 items:
  1. Creating a custom field type to make it easier to work with the components of a name (currently only first and last names, but could later be expanded to more).
  2. Controlling how the standard Field Renderer web control behaves when it is used to render a custom field.
  3. Configuring a custom field renderer control to make it easier to configure the display formatting for a name field
Step 1 - Create new field type
My first step it to create a new field type. This will make it much easier for people working with the Sitecore API to work with name fields. Since I will need to work with field names in a later step, I will be the first person to benefit from this addition.

Also, this code will serve as a replacement for the NameFieldUtils class. Same logic, different location.
public class NameFieldType : CustomField
{
public static string GetFullName(string firstName, string lastName)
{
var name = new string[2];
name[0] = firstName;
name[1] = lastName;
return String.Join(" ", name);
}
public static string GetFirstName(string fullName)
{
string[] parts = fullName.Split(' ');
if (parts.Length >= 1)
{
return parts[0];
}
return string.Empty;
}
public static string GetLastName(string fullName)
{
string[] parts = fullName.Split(' ');
if (parts.Length >= 2)
return parts[1];
return string.Empty;
}
public NameFieldType(Field innerField) : base(innerField) { }

public static implicit operator NameFieldType(Field field)
{
if (field != null)
return new NameFieldType(field);
return null;
}

public string FirstName
{
get { return NameFieldType.GetFirstName(InnerField.Value); }
}

public string LastName
{
get { return NameFieldType.GetLastName(InnerField.Value); }
}
public string FullName
{
get { return InnerField.Value; }
}
}
Step 2 - Register new field type
When working with content using the Sitecore API, a class is used. Different classes support different types of field. Sitecore needs to know which class should be used for which field type. This mapping is specified in the FieldTypes.config file.

In order for Sitecore to be able to resolve the "Name Field" type to the NameFieldType class I just created, I need to add the following to the FieldTypes.config file:
<fieldType name="Name Field" type="sctest.NameFieldType,sctest" />

Step 3 - Write code that controls the inline editing interface
Next I need to tell Sitecore how a name field value should be displayed in Page Editor. There are a couple of things I want to configure. First, I don't want users to be able to enter a value inline. I want all name values to be entered through my custom interface. I need to disable inline editing. Second, I want my custom interface to appear when a user clicks a name value in Page Editor.
public class GetNameFieldValue
{
public void Process(RenderFieldArgs args)
{
switch (args.FieldTypeKey)
{
case "name field":
{
args.DisableWebEditContentEditing = true;
args.WebEditClick = "return Sitecore.WebEdit.editControl($JavascriptParameters,'sctest:EditNameButton');";
break;
}
}
}
}

Step 4 - Configure Sitecore to use the code
The Sitecore's renderField pipeline is responsible for rendering fields in Page Editor. The pipeline is defined in web.config. One of the steps in the pipeline is to determine what value should be rendered for a specific field. An addition to this pipeline is needed since I want to change the field renderer's default behavior.

I need to add a processor to the renderField pipeline. The processor will use the class I just created. The path to this pipeline in web.config is /configuration/sitecore/pipelines/renderField. The line should be added before the processor that uses the type Sitecore.Pipelines.RenderField.AddBeforeAndAfterValues. After I make my addition the renderField pipeline looks like the following:
<renderField>
<processor type="Sitecore.Pipelines.RenderField.SetParameters, Sitecore.Kernel"/>
<processor type="Sitecore.Pipelines.RenderField.GetFieldValue, Sitecore.Kernel"/>
<processor type="Sitecore.Pipelines.RenderField.ExpandLinks, Sitecore.Kernel"/>
<processor type="Sitecore.Pipelines.RenderField.GetImageFieldValue, Sitecore.Kernel"/>
<processor type="Sitecore.Pipelines.RenderField.GetLinkFieldValue, Sitecore.Kernel"/>
<processor type="Sitecore.Pipelines.RenderField.GetInternalLinkFieldValue, Sitecore.Kernel"/>
<processor type="Sitecore.Pipelines.RenderField.GetMemoFieldValue, Sitecore.Kernel"/>
<processor type="Sitecore.Pipelines.RenderField.GetDateFieldValue, Sitecore.Kernel"/>
<processor type="Sitecore.Pipelines.RenderField.GetDocxFieldValue, Sitecore.Kernel"/>
<processor type="sctest.GetNameFieldValue, sctest"/>
<processor type="Sitecore.Pipelines.RenderField.AddBeforeAndAfterValues, Sitecore.Kernel"/>
<processor type="Sitecore.Pipelines.RenderField.RenderWebEditing, Sitecore.Kernel"/>
</renderField>

After I compile my code I can test my changes. I can no longer directly edit a name field value. In addition, when I click the value in Page Editor, my custom user interface appears.

The next thing I want to do is create a custom field renderer in order to provide some extra functionality for my custom field type.

Step 5 - Create a new field renderer
My new field renderer is going to allow a developer to specify a formatting for a name. By default the first name followed by last name will be displayed. This is the value the default field renderer uses. But my custom field renderer is going to support options that will display only the first name, only the last name, and the last name followed by the first name, in addition to the default display format.

In order to accomodate this I need a custom field renderer that supports a format option. Since a developer is able to set the format option value, I need to make sure this value is made available to Sitecore in the way Sitecore expects. The following class does these things:

Assembly name: sctest.dll
Namespace: sctest
Class name: NameFieldControl
Base class: Sitecore.Web.UI.WebControls.FieldControl
public class NameFieldControl : Sitecore.Web.UI.WebControls.FieldControl
{
public string Format { get; set; }

protected override void PopulateParameters(Sitecore.Collections.SafeDictionary<string> parameters)
{
parameters.Add("format", this.Format);
base.PopulateParameters(parameters);
}
}

Step 6 - Implement support for formatting options
Now that I have the ability to support a format value, I need to implement the logic to use that value to determine the text that is displayed when a name field is displayed. That is going to require a modification to the GetNameFieldValue class (the class that I added to the renderField pipeline).

The format value that was set in the previous step is available in the pipeline through the RenderFieldArgs parameter. I use that value to determine how to format the name field's value.
public void Process(RenderFieldArgs args)
{
switch (args.FieldTypeKey)
{
case "name field":
{
//
//
NameFieldType field = args.Item.Fields[args.FieldName];
string displayValue = null;
//
//
var format = args.Parameters["format"];
switch (format)
{
case "FirstNameOnly":
displayValue = field.FirstName;
break;
case "LastNameOnly":
displayValue = field.LastName;
break;
case "LastCommaFirst":
displayValue = string.Format("{0}, {1}", field.LastName, field.FirstName);
break;
case "Complete":
default:
displayValue = field.FullName;
break;
}
args.Result.FirstPart = displayValue;
args.DisableWebEditContentEditing = true;
args.WebEditClick = "return Sitecore.WebEdit.editControl($JavascriptParameters,'sctest:EditNameButton');";
break;
}
}
}

Step 7 - Use the custom field renderer
Now I'm ready to use my custom field renderer. I need to add the following code to the top of my sublayout:
<%@ Register TagPrefix="sctest" Namespace="sctest" Assembly="sctest" %>

And then I need to use my new field renderer:
<sctest:NameFieldControl ID="NameFieldControl1" runat="server" Field="Name" Format="LastCommaFirst" />
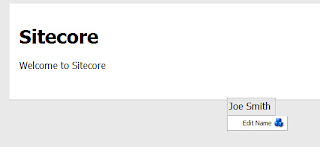
When I view my site, I see that the name field is formatted as specified.

Custom field renderer in action.

Next steps
This is the end of my 3-part series on custom fields. You can download the finished source code here.

Want to learn more?
See my previous post for good links.

Monday, March 22, 2010

Custom Fields, Part 2

In my Custom Fields, Part 1 post I demonstrated how to create a customized user interface for editing field content in Content Editor. This post is going to cover how to do the same sort of thing for Page Editor.


Demonstration of the component described in this post.

I know that I promised a custom field render in my previous post, but that's going to have to wait until my next post. This post has more ground to cover than I expected! But that's OK because a custom field renderer isn't needed to create the custom user interface. The generic field renderer is able to handle the user interface we're going to build.

A word of warning
But before I go any further I feel it is important to provide a warning. When I started looking into custom field types I was very excited by the idea of them. Then I talked to some colleagues and learned that custom field types are not all that common in the real world. There are some good reasons for this:
  • They are not very flexible - If new content needs to be added to a custom field type, it can result in a lot of work. The amount of work is hard to justify when you consider how easy it is to add a new field on a data template. In other words, using data templates to define the content is easier than creating and maintaining custom fields.
  • The parts of Sitecore that are needed to create custom field types are not entirely documented.
  • Creating this type of customization is risky because of changes that might be made to the API or to the Sitecore user interface in the future.
Having said that, I still believe there is value is knowing how to do this. The exercise has taught me a lot about how Sitecore handles content, as well as how the Sitecore client works. Now, on to the code...

Step 1 - Refactor name-parsing logic
In my previous post I included name-parsing logic directly in the name field control. If you remember, the purpose of this control was to display a custom interface for editing a name field using Content Editor.

This time I am creating a custom interface for editing a name field using Page Editor, so I'm going to need name-parsing logic again. Rather than duplicate the code, I'm going to create a utility class to hold that logic:

Assembly name: sctest.dll
Namespace: Sctest
Class name: NameFieldUtils
Base class: System.Object
public class NameFieldUtils
{
public static string GetFullName(string firstName, string lastName)
{
var name = new string[2];
name[0] = firstName;
name[1] = lastName;
return String.Join(" ", name);
}
public static string GetFirstName(string fullName)
{
string[] parts = fullName.Split(' ');
if (parts.Length >= 1)
{
return parts[0];
}
return string.Empty;
}
public static string GetLastName(string fullName)
{
string[] parts = fullName.Split(' ');
if (parts.Length >= 2)
return parts[1];
return string.Empty;
}
}

Step 2 - Rename the NameField class to NameControl
In order to avoid any possible confusion regarding the purpose of the various classes being created, rename the control created in the last post to NameControl. Recompile your code. Don't forget to change the control name in the core database, too (/sitecore/system/Field types/Custom Field Types/Name Field).

Step 3 - Modify the OnLoad method from NameControl
The name-parsing logic was moved into NameFieldUtils, so the OnLoad method should use NameFieldUtils. OnLoad should look like the following:
protected override void OnLoad(EventArgs e)
{
if (!Sitecore.Context.ClientPage.IsEvent)
{
//
//create the controls
var textFirstName = new Sitecore.Shell.Applications.ContentEditor.Text();
this.Controls.Add(textFirstName);
textFirstName.ID = GetID("textFirstName");
var textLastName = new Sitecore.Shell.Applications.ContentEditor.Text();
this.Controls.Add(textLastName);
textLastName.ID = GetID("textLastName");
//
//set the values on the textbox controls
textFirstName.Value = NameFieldType.GetFirstName(this.Value);
textLastName.Value = NameFieldType.GetLastName(this.Value); ;
}
else
{
//
//read the values from the textbox controls
var textFirstName = FindControl(GetID("textFirstName")) as Sitecore.Shell.Applications.ContentEditor.Text;
var textLastName = FindControl(GetID("textLastName")) as Sitecore.Shell.Applications.ContentEditor.Text;
//
//set the value on the NameControl control
var firstName = (textFirstName != null ? textFirstName.Value : string.Empty);
var lastName = (textLastName != null ? textLastName.Value : string.Empty);
this.Value = NameFieldType.GetFullName(firstName, lastName);
}
base.OnLoad(e);
}

This is a good point to test your changes. Recompile your code and make sure everything works as it did before you started reading this post. No new functionality has been added to Sitecore yes, so your code should work the same as it did before.

Step 4 - Create a layout
The Sitecore client user interface is built using XAML. This technology allows user interface components to be defined using XML. An XML Layout can be used to define the user interface.
  1. Switch to the core database.
  2. Open Developer Center.
  3. In the top menu, select File --New.
  4. The New File window appears. Select XML Layout from the Layouts category.
  5. Click the Create button.
  6. The new file wizard appears. For the name enter "Name Field Editor Layout". Then click the Next button.
  7. For the location select the \Layouts\Dialogs node. Click the Next button.
  8. For the file location select the \Website\layouts node. Click the Create button.
  9. Click the Finish button.
  10. The newly created XAML file appears in Developer Center. This file can be edited using Developer Center, or by editing the file Test Field Editor Layout.xml directly from the file system.
Step 5 - Specify the user interface components
The XML file created in the previous step must have controls in order to display a meaningful user interface.
<control xmlns:def="Definition" xmlns="http://schemas.sitecore.net/Visual-Studio-Intellisense">
<NameFieldEditorLayout>
<FormDialog Icon="Applications/32x32/text_marked.png" Header="Enter Name" Text="Enter the name." OKButton="OK">
<GridPanel Columns="2">
<Literal Text="First name:"/>
<Edit ID="FirstName" Width="300" />
<Literal Text="Last name:"/>
<Edit ID="LastName" Width="300" />
</GridPanel>
<CodeBeside Type="sctest.NameFieldEditor,sctest.dll"/>
</FormDialog>
</NameFieldEditorLayout>
</control>

Some of the code above is self-explanatory, I think. Here's a description of the parts that aren't obvious:
  • NameFieldEditorLayout - If you look in the core database you can find the item that was generated when you used Developer Center to create a new XML layout: /sitecore/layout/Layouts/Dialogs/Name Field Editor Layout. One of the properties of this item is its control name: NameFieldEditorLayout. This value was automatically generated by Developer Center. When Sitecore uses the XML layout, it is going to look for the XAML file that has the definition of NameFieldEditorLayout. By containing the tag NameFieldEditorLayout, this file becomes the file Sitecore will use.
  • FormDialog - Creates a modal window.
  • GridPanel - Creates a 2-column table. Each control inside the GridPanel tag gets its own cell. The 1st control gets the 1st cell in the 1st column. The 2nd control gets the 2nd cell in the 1st column. The 3rd control gets the 1st cell in the 2nd column. The 4th control gets the 2nd cell in the 2nd column.
  • CodeBeside - Defines the file that will contain code like event handlers.
Step 6 - Create the CodeBeside file
This file contains the code to handle events generated by the user interface. There are 2 methods in this file:
  1. OnLoad - This code runs when the dialog window is loaded. Specifically, the code sets the values of the FirstName and LastName input fields to be the current field value. This is done by reading a query string value. The query string value is set by code I will write in a later step.
  2. OnOK - This code runs when the OK button is clicked. Specifically, the code passes the values in the FirstName and LastName input fields back to the code that opened the dialog window in the first place. That, also, is code that I will write in a later step.

public class NameFieldEditor : DialogForm
{
protected Sitecore.Web.UI.HtmlControls.Edit FirstName;
protected Sitecore.Web.UI.HtmlControls.Edit LastName;
protected override void OnLoad(EventArgs e)
{
if (! Sitecore.Context.ClientPage.IsEvent)
{
//
//The values are not actually stored on the item itself
//until the save button is clicked, so we can't read
//the values from the item. Instead, read the values
//from the webedit interface. These values should have
//been included in the QueryString by the WebEditCommand
//instance that opened the dialog.
var name = Sitecore.Context.Request.QueryString["name"];
if ((name != null) && (! string.IsNullOrEmpty(name)))
{
FirstName.Value = NameFieldType.GetFirstName(name); ;
LastName.Value = NameFieldType.GetLastName(name); ;
}
}
base.OnLoad(e);
}
protected override void OnOK(object sender, EventArgs args)
{
//
//Write the response value that will be available to the
//WebEditCommand class that caused this dialog to appear.
var xml = string.Format("<name><first>{0}</first><last>{1}</last></name>", FirstName.Value, LastName.Value);
SheerResponse.SetDialogValue(xml);
base.OnOK(sender, args);
}
}


Step 7 - Create an item for the user interface
Sitecore needs to know that my user interface is available. This is done by creating an item in the core database:

Item to create the item on: /sitecore/content/Applications/Dialogs
Template: /sitecore/templates/Common/Folder
Item Name: Name Field Editor

Step 8 - Identify the layout that applies to the user interface item
Open the Presentation Details for the item created in the previous step. Set the layout to be Layouts/Dialogs/Name Field Editor Layout.

Step 9 - Define buttons for the custom field type
When a content author wants to set a value for a name field, I want the author to be able to click a button that will cause the name field editor dialog to appear. I need to define the button. But first I need to create a folder to hold the button. Create the following item:

Item to create the item on: /sitecore/system/Field types/Custom Field Types/Name Field
Template: /sitecore/templates/Common/Folder
Item Name: WebEdit Buttons

Next I create the button itself. Create the following item:

Item to create the item on: /sitecore/system/Field types/Custom Field Types/Name Field/WebEdit Buttons
Template: /System/WebEdit/WebEdit Button
Item Name:
Edit Name

A couple of field values must be specified for this item. Set the following values:

Header: Edit Name
Click: javascript:return Sitecore.WebEdit.editControl($JavascriptParameters, "sctest:EditNameButton")
Tooltip: Edit Name

Step 10 - Register the command
In the previous step I configured a button. One of the settings was the Javascript code to run when the button is clicked. The code tells Sitecore to execute a command named "sctest:EditNameButton" when the button is clicked. I need to tell Sitecore what code corresponds to this command. This is done by adding a command to the commands.config file.
<command name="sctest:EditNameButton" type="sctest.EditNameButtonCommand,sctest">

Step 11 - Implement the command
The class identified in the previous step contains the logic that is run when the specified command is executed (meaning when the edit name button is clicked).

This class extends Sitecore.Shell.Applications.WebEdit.Commands.WebEditCommand. The class has 2 methods in it:
  1. Execute - This method reads the current name field value. It sets this value as a parameter, which is important because this will make the value available inside the Run() method. Then the method calls the Run() method.
  2. Run - If the code is running during a PostBack it means either the Cancel or the OK button was clicked. If the Cancel button was clicked (there is no result, so args.HasResult is false) there is nothing else to do so the method returns. If the OK button was clicked, the XML generated by NameFieldEditor.OnOK() is parsed and the first and last names are set for the field in Page Editor.

    If the code is not running during a PostBack, that means someone has clicked the edit name button. The name field editor dialog window is displayed, and the current field value must be passed to the window.

public class EditNameButtonCommand : WebEditCommand
{
public override void Execute(CommandContext context)
{
//
//Read the value that is currently set on the field
//in the page editor. Since the page editor interface
//only writes field values after the user clicks the
//save button it is important that the value be read
//from the page editor rather than the item itself.
var formValue = WebUtil.GetFormValue("scPlainValue");
context.Parameters.Add("name", formValue);
Sitecore.Context.ClientPage.Start(this, "Run", context.Parameters);
}

protected void Run(ClientPipelineArgs args)
{
if (args.IsPostBack)
{
if (! args.HasResult)
{
return;
}
//
//Read the first and last names from the returned XML.
var dom = new XmlDocument();
dom.LoadXml(args.Result);
var firstName = dom.SelectSingleNode("/name/first").InnerText;
var lastName = dom.SelectSingleNode("/name/last").InnerText;
var fullName = NameFieldType.GetFullName(firstName, lastName);
//
//Set the first and last names. These values should not be
//saved directly on the item. The page editor will handle
//that when the user clicks the save button. Instead, the
//values should be set in a way that the page editor will
//store the values until the user clicks the save button.
SheerResponse.SetAttribute("scHtmlValue", "value", fullName);
SheerResponse.SetAttribute("scPlainValue", "value", fullName);
SheerResponse.Eval("scSetHtmlValue('" + args.Parameters["controlid"] + "')");
}
else
{
//
//get the url for the dialog that needs to be displayed
var db = Sitecore.Data.Database.GetDatabase("core");
var item = db.GetItem("{6C57B044-C860-4DAF-982E-5A64E467C1CD}");
var url = new UrlString(LinkManager.GetItemUrl(item));
//
//pass the current value to the dialog
var name = args.Parameters["name"];
if (name != null)
url.Add("name", name);
//
//display the dialog
Sitecore.Context.ClientPage.ClientResponse.ShowModalDialog(url.ToString(), true);
args.WaitForPostBack();
}
}
}


Note: in order to compile this code, you may need to add a reference to the Sitecore.Client.dll assembly. If using Visual Studio because to set CopyLocal to false.

Step 12 - Test the code
After I compile my code I am ready to test it. I need to make sure I have a field in a data template that uses the Name Field type. In the sublayout (or rendering) you're using to display the field value, make sure you're using the field renderer to display the value. You should be able to go into page editor and click the Edit Name button.


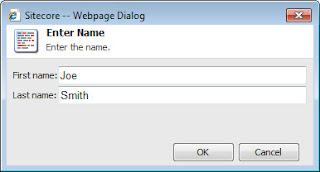
And when I click the button, I see the name field editor.


Next steps
In my next post I will demonstrate how to create a custom field renderer. Also, when you use the default field renderer on a name field, you may notice there is some unwanted functionality. I'll tell you what it is in my next post - along with a solutions for it. In the meantime, here's a hint: is there any way for a Page Editor user to circumvent the name field editor interface?

Want to learn more?

Friday, March 5, 2010

Custom Fields, Part 1

Like most WCM systems, Sitecore supports both structured and unstructured content. The difference between structured and unstructured content can be explained through an example. Let's say you want to allow a person from the marketing department to create a new press release for your website. With structured content the person would need to provide a title, date, description, and an image. With unstructured content the person would get a big HTML field and would provide any values he wants.

What is a field type?
When working with structured content, the concept of "content type" is important. Is the content you're modeling a string, a date or an image? If the content is a string, is formatting supported? The answers to these questions determine what the user interface looks like for the people using the system.

Sitecore has an interesting way of handling content type. Content is defined using fields, and each field has a type. Sitecore comes with a large number of different field types out of the box.

Why should you be interested in custom field types?
As powerful and flexible as Sitecore field types are, it is possible that you will encounter a requirement that would be much easier to meet if you create your own field type.

Not all WCM systems can do this. The impact of this is a significantly more complicated content model. This means more work for developers to create and more work for content authors to use. It also has a potentially devastating effect on workflow (imagine a proliferation of distinct pieces of managed content that somehow must be related).

This functionality has so many applications. It can be used to integrate with external data sources. It can be used to create easier-to-use interfaces for text values (as this article will explain). It can be used to facilitate content migration. And much more.

How are custom field types handled in Sitecore?
As you would expect, Sitecore provides many ways to handle custom field types. And as you would expect, the method you choose depends on your requirements. I'm going to cover a number of these in future posts.

To give you an idea of the scope of this topic, developing a custom field requires you consider the following:
  1. How does a person edit field content in Content Editor mode?
  2. How does a person edit field content in Page Editor mode?
  3. How is field content stored in Sitecore?
  4. How is field content accessed using the Sitecore API?
  5. How is field content rendered in presentation logic?
Not every custom field needs to have a custom solution for each of these. This post covers only the first one. I will explain how to create a custom interface for entering a text value. I think this is a good place to start since a large part of creating custom field types is building the user interface for reading and writing field content.

The Sitecore Developer Network has an excellent article that explains how to create something called a "composite custom field". What this post covers is very similar to that, but is much simpler. This will give me something to build on in subsequent posts.

This post will explain how to create a custom field to make it a little easier to enter a person's name. For the sake of simplicity, I am going to assume that a person has a first name (given name) and a last name (family name or surname). The person's name will be stored as a single value in Sitecore, but the user interface will allow content editors to enter the values separately.

What is a composite custom field?
A composite custom field is made up of existing field types. My custom field needs to support two separate text values. Since Sitecore already has the Text field type, a composite custom field is appropriate. I can use two Text fields to create my custom field.

Step 1 - Create an HTML server control
Using Visual Studio create the following class. This control will generate the user interface Sitecore displays when someone edits the value of a field:

Assembly name: sctest.dll
Namespace: Sctest
Class name: NameField
Base class: Sitecore.Web.UI.HtmlControls.Control

Step 2 - Override the OnLoad method
In the Sctest.NameField class, override the OnLoad method. This method is inherited from System.Web.UI.WebControl, which is a base class for Sitecore.Web.UI.HtmlControls.Control. Just like with a standard ASP.NET web control, the purpose of this method is to load and set properties on child controls.


protected override void OnLoad(EventArgs e)
{
base.OnLoad(e);
}

This control needs 2 textbox controls (first name and last name). The first thing this method does is checks to see if these controls have already been loaded. This is accomplished by checking the value of the IsEvent property on the ClientPage.


protected override void OnLoad(EventArgs e)
{
if (!Sitecore.Context.ClientPage.IsEvent)
{
}
else
{
}
base.OnLoad(e);
}

ClientPage represents the current web form. Checking ClientPage.IsEvent is very similar to checking Page.IsPostback in ASP.NET. This layer of abstraction is important because it frees Sitecore from being tied to web forms. But that's a topic for a later post.

If ClientPage.IsEvent is not true it is likely that the 2 textbox controls have not already been created. The textboxes need to be created. The textbox controls also need to be added as children on the NameField control.


//
//create the textbox controls
var textFirstName = new Sitecore.Shell.Applications.ContentEditor.Text();
textFirstName.ID = GetID("textFirstName");
var textLastName = new Sitecore.Shell.Applications.ContentEditor.Text();
textLastName.ID = GetID("textLastName");
//
//add the textbox controls as children
this.Controls.Add(textFirstName);
this.Controls.Add(textLastName);

The current item may already have a value set for the name, so that value needs to be loaded into the control. Sitecore handles the work of actually reading and writing field values. It does so through the control's Value property. The Value property is a string, which should come as no surprise since, internally, Sitecore stores content as text.

The logic we will use is very simple. The first space character in the value will serve as the separator between the first and last names.


var firstName = "";
var lastName = "";
var currentValue = this.Value;
var firstSpace = currentValue.IndexOf(' ');
if (firstSpace == -1)
{
firstName = currentValue;
}
else
{
firstName = currentValue.Substring(0, firstSpace);
lastName = currentValue.Substring(firstSpace).Trim();
}
textFirstName.Value = firstName;
textLastName.Value = lastName;

Next we need to consider the code that belongs in the else-block. This code runs when ClientPage.IsEvent is true. One important example of when this code will run is when an item is saved. Specifically, this code will run when the item is saved using a ClientPage with this control on it. For this reason, this code must take the values from the 2 textbox controls and set a value on the NameField control.


var textFirstName = FindControl(GetID("textFirstName")) as Sitecore.Shell.Applications.ContentEditor.Text;
var textLastName = FindControl(GetID("textLastName")) as Sitecore.Shell.Applications.ContentEditor.Text;
var name = new string[2];
name[0] = textFirstName.Value;
name[1] = textLastName.Value;
this.Value = String.Join(" ", name);

The complete code is the following:


public class NameField : Sitecore.Web.UI.HtmlControls.Control
{
protected override void OnLoad(EventArgs e)
{
if (!Sitecore.Context.ClientPage.IsEvent)
{
//
//create the controls
var textFirstName = new Sitecore.Shell.Applications.ContentEditor.Text();
this.Controls.Add(textFirstName);
textFirstName.ID = GetID("textFirstName");
var textLastName = new Sitecore.Shell.Applications.ContentEditor.Text();
this.Controls.Add(textLastName);
textLastName.ID = GetID("textLastName");
//
//get the current value
var firstName = "";
var lastName = "";
var currentValue = this.Value;
var firstSpace = currentValue.IndexOf(' ');
if (firstSpace == -1)
{
firstName = currentValue;
}
else
{
firstName = currentValue.Substring(0, firstSpace);
lastName = currentValue.Substring(firstSpace).Trim();
}
//
//set the values on the textbox controls
textFirstName.Value = firstName;
textLastName.Value = lastName;
}
else
{
//
//read the values from the textbox controls
var textFirstName = FindControl(GetID("textFirstName")) as Sitecore.Shell.Applications.ContentEditor.Text;
var textLastName = FindControl(GetID("textLastName")) as Sitecore.Shell.Applications.ContentEditor.Text;
var name = new string[2];
name[0] = textFirstName.Value;
name[1] = textLastName.Value;
//
//set the value on the NameField control
this.Value = String.Join(" ", name);
}
base.OnLoad(e);
}
}

Step 3 - Compile your code
Compile your code and put the assembly in a directory that Sitecore will be able to find it.

Step 4 - Define a custom field type in Sitecore
This step involves adding the custom field to the Sitecore client so that developers can use it.

Step 4.1. Log into the Sitecore Content Editor and connect to the core database.

Step 4.2. Create the following item:

Item to create the item on: /sitecore/system/Field types
Template: /sitecore/templates/Common/Folder
Item Name: Custom Field Types

Step 4.3. Create the following item:

Item to create the item on: /sitecore/system/Field types/Custom Field Types
Template: /System/Templates/Template field type
Item Name: Name Field

Step 4.4. Select the Name Field item. Enter the following field values:

Control: myfields:NameField

Step 4.5. Save your changes and switch to the master database.

What you have just done is told Sitecore is that a new field type is available. This field type is named "myfields:NameField". How does Sitecore know what code to use when this field type is used? That is configured in the next step.

Step 5 - Map the field prefix to an assembly and namespace
The custom field's name (configured in the previous step) is a combination of a prefix (myfields) and a class name (NameField). This step involves telling Sitecore which assembly contains the class NameField.

This is done through the web.config file. I added the following line to the /configuration/sitecore/controlSources node. It tells Sitecore that any control identified using the prefix "myfields" can be located in the "sctest" assembly and is a part of the "sctest" namespace:


How to use a composite custom field
Now, when you configure a field in a Data Template, you should see a new option available in the list of field types. I added the following field:

Data template: /sitecore/templates/Sample/Sample Item
Field name: Name
Type: Name Field

The Home item in my installation is an instance of this data template. Using Content Editor, I see the following when I edit content:


I also modified the layout that is used for this item so that the name value appears on the website. I added the following code inside the body:


Next steps
We have created a custom interface for configuring content using Content Editor, but this interface is not available in Page Editor. The next step is to expand this functionality to Page Editor. This will require a custom field renderer web control.

Want to learn more?